Photo Formats
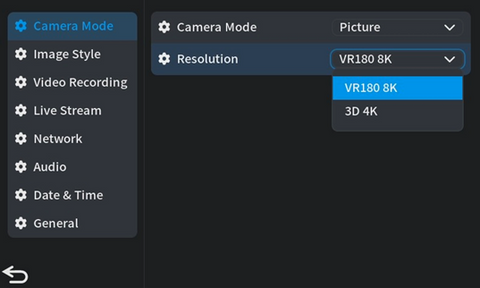
- Supports both VR180 8K and 3D 4K formats and resolutions.
Image Quality Settings
- Power on the camera -> click the "Settings" icon in the bottom right of the screen or press the "Menu" button -> enter the menu item -> click "Image Style" -> adjust the photo settings for "Brightness," "Contrast," "Saturation," "Sharpness," "3D Noise Reduction," and any other relevant parameters.
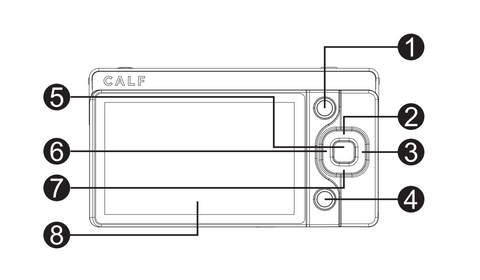
- Advanced parameter settings: To adjust professional settings such as "White Balance," "ISO," "Exposure Value (EV)," and others, use the directional keys on the camera's back, located on the right side. The effects of these settings will be displayed on the screen. (② for Up/ISO, ③ for Right/EV (Exposure Value), ⑥ for Left/White Balance, and ⑦ for Down/Exposure Settings)
Photo Parameter Settings
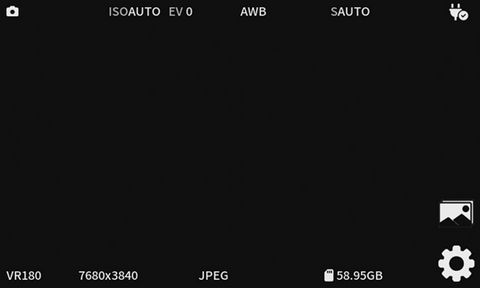
- Power on the camera -> click the "Settings" icon in the bottom right of the screen or press the "Menu/Ok" button -> enter the menu item -> click "Mode" -> in the right menu, select "Photo" from the drop-down menu for "Camera Mode" -> choose the appropriate resolution from the drop-down menu for "Resolution" -> complete the basic settings for photo shooting -> after completing the basic settings for photo shooting, press the camera's "back button" -> the upper left corner of the display shows the photo shooting icon -> click the camera's "shooting button" to start shooting photos
- To browse and play the captured photos, tap the "Image" icon in the bottom right of the screen or press the album button.
- On the album page, click the up button or the screen upload button to upload.
Notes: Make sure the SD card is inserted into the camera and has enough storage space.